The most important recipe my mom taught me before I got married is Zwieback, buns or rolls. You see, I live about 15 km from the nearest supermarket. If I were to rely on shopping for fresh bread, I'd be driving around all the time. But if I bake these pillowy soft rolls once or twice a week then freeze them, we can have some fresh buns on our table all week. I took pictures this week and will give you the recipe step-by-step. Here goes:
Zwieback, the Mennonite buns/rolls
1 liter of milk
Put this into a pot and let boil up once.
Add 1 cup of butter.
I put the pot with milk and butter into my sink, fill it half way full with water and let it cool down to slightly warmer than room temperature.
When the milk has cooled down, put 2 tablespoons of yeast and 1 tablespoon of sugar into a large bowl, add 1 cup of slightly warmer than luke warm water and let stand for 5 minutes.
The yeast will start to bubble a bit, then you know it's done. I used instant dry yeast, but I've had the same good results with normal dry yeast and also with yeast cakes.
Add the milk/butter mixture and add 2 tablespoons of salt.
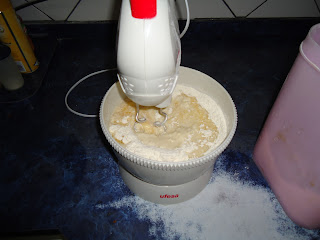
Then add flour, one cup at a time and with your kneading hooks on your beater/kitchen aid or with your bare hands, start mixing the dough together. Keep adding flour until you have a nice and soft, but not sticky dough.
I used 9 cups of flour, but you might need more of less. You can also replace some of the flour with whole wheat, sorghum, rye or any other kind of flour. I also add sesame seeds, linseeds, and/or sunflower seeds to the mixture at this point.
When the dough looks like this, you can transfer the dough to a larger bowl and knead it some more with your hands. Sometimes you might have to add some oil to your hands, so that the dough doesn't stick too much.
Then put your cutest tea towel over the dough, put it in a warm place and set your timer for about one hour.
After an hour your dough should look like this.
Now comes the tricky part: take some dough into your greased hands, and pinch an egg-sized portion out through your index finger and thumb. Place the roll on a greased sheet and fill one sheet like this.
(If you do all three sheets at once, the last sheet you bake will probably rise too much and flatten out. So I prepare the first sheet, wait 15 minutes, do the second, etc)
Place a clean (cute) tea towel over the rising buns and place in a warm spot in your kitchen. After the first batch has risen for 3/4 hour turn your oven on highest and wait for 15 minutes to place the first sheet into the hot oven.
After 12 - 15 minutes your Zwieback should look like this, and your kids and neighbors will be standing at your door asking for a fresh bun:)
Dump the fresh buns onto the counter top to cool off, then eat them all:) or package into plastic bags to freeze for later.
I hope you enjoyed this recipe. I used the terms Zwieback, rolls and buns throughout the recipe. In german we call these Zwieback. (Even though real Zwieback means to bake something twice or to roast bread) At home we called these buns, but I've heard the word used for some body part too. Rolls is what I think the Canadians and Americans would call these.
Call 'em what you like, they're good!
Thank you for joining me today for my first recipe tutorial. Here are the ingredients once more:
Zwieback
1 liter (4 cups) milk
1 cup (200 gr) butter
2 tbsp yeast
1 tbsp sugar
1 cup warm water
2 tbsp salt
about 9 cups of flour


Those look awesome!!! I'm going to have to convince Honeybunny to make some (he's the bread baker in the family - I'm just the bread eater!!)
ReplyDeleteNow if I still had my family at home, a mixer (gave it to my daughter!) or even a big freezer, I would consider making these. I do get these kinds of lovely buns and bread at my daughter's house! Yum!
ReplyDeleteGreat job though on sharing the recipe and showing the whole process. That's a pretty tea towel! Have a great day!
Put on the teapot. I'll be right over for a bun! lol They look wonderful. The towel is so cute.
ReplyDeleteHave a good day!
Die sehen lecker aus:-)
ReplyDeleteBrenda:
ReplyDeleteThese are on my list for Saturday for baking! I love it when you share your heritage!
Oh Brenda,
ReplyDeleteIf only I could bring some coffee over and we could enjoy these together. :->
Happy VGNO!!!
Thanks for the great tutorial, Brenda! I made these today and they were wonderful.
ReplyDelete